 Pin
Pin
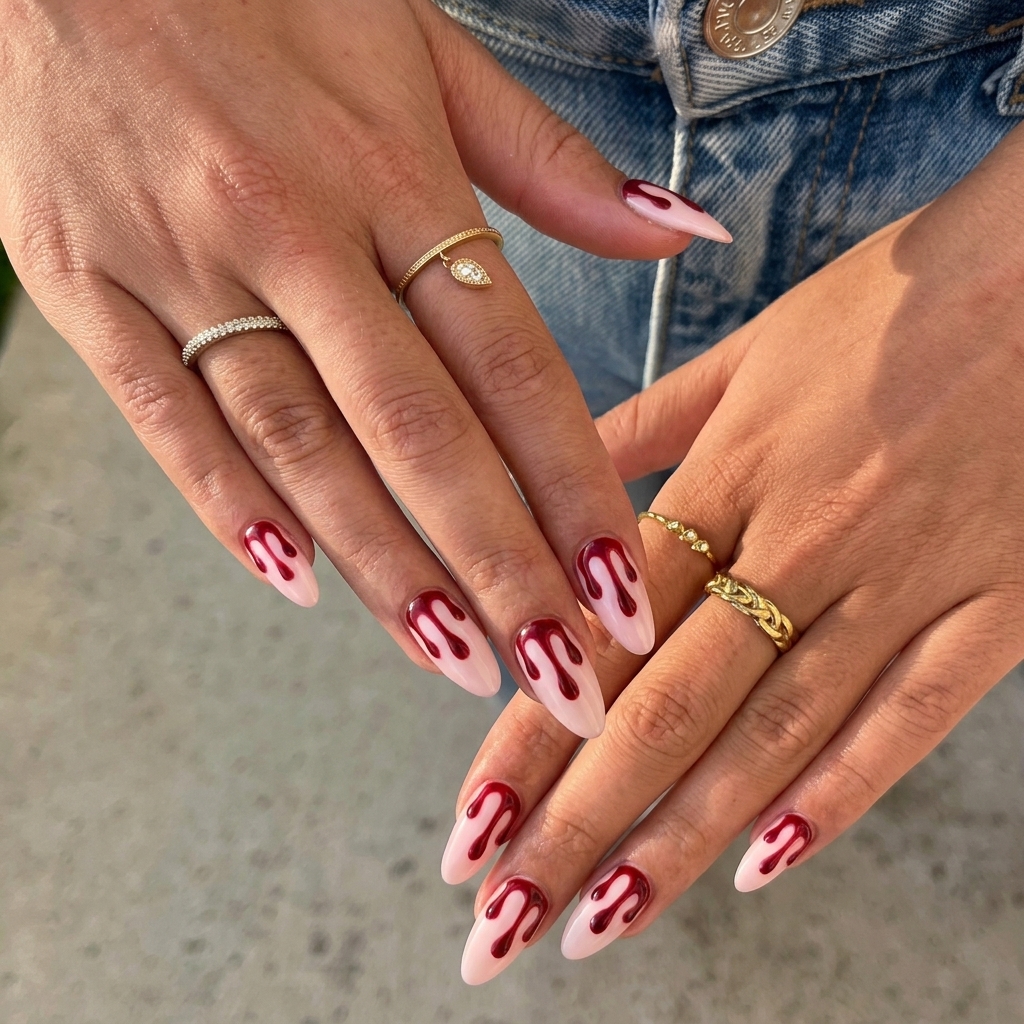
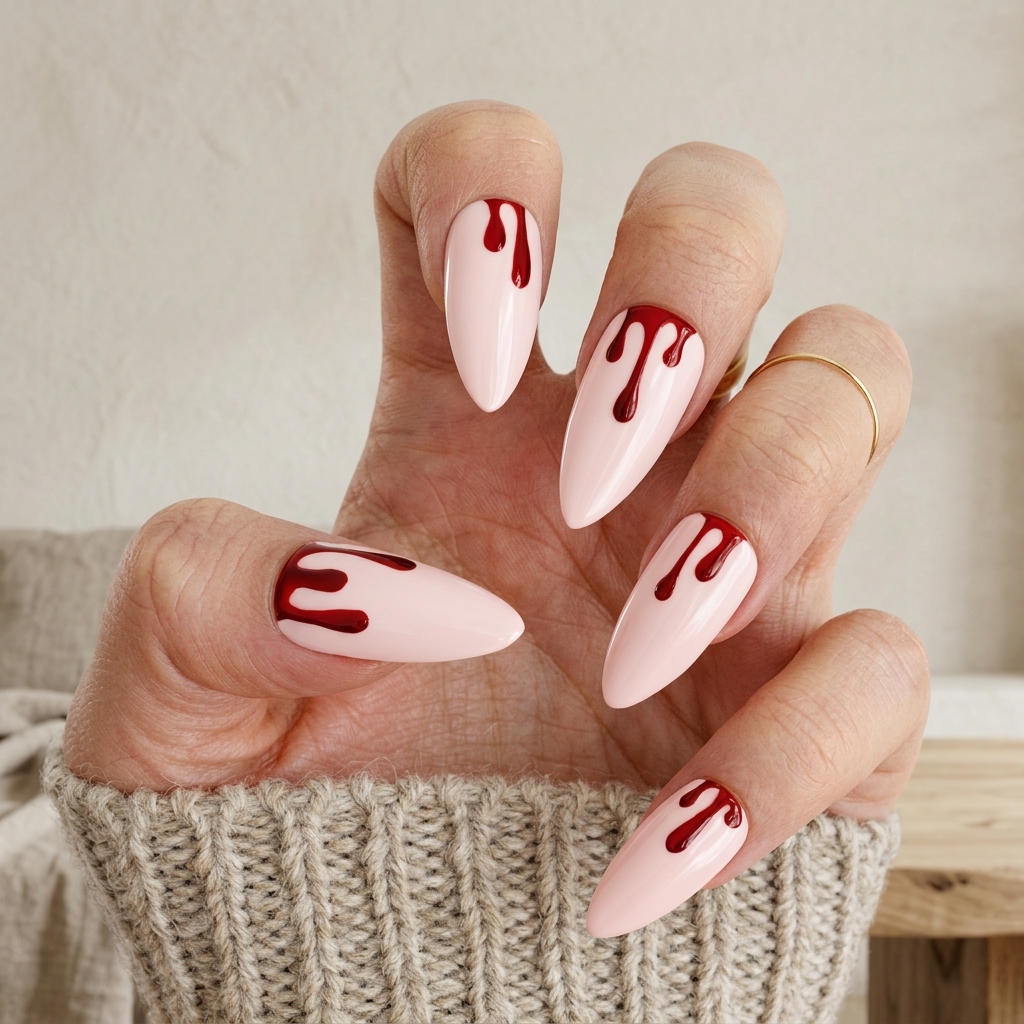
This vampy Chrome Blood Drip nail art is always a crowd-pleaser when October rolls around. The glossy cherry-red drips look beautifully eerie against a soft blush-pink base, especially on long almond tips. Whether it is for Halloween or just to add a dash of drama, these nails are guaranteed to make people look twice. Over the years, I have refined my technique to keep the drips clean, symmetrical, and artfully messy at the same time. The finished effect looks intricate, but if you know what tools to pick and take your time, it comes together in an evening.
Creating this look feels a little like painting candy—there is something so satisfying about shaping each distinct drip, and the way the red polish pools and sets just right always gives me that pro-level confidence boost.
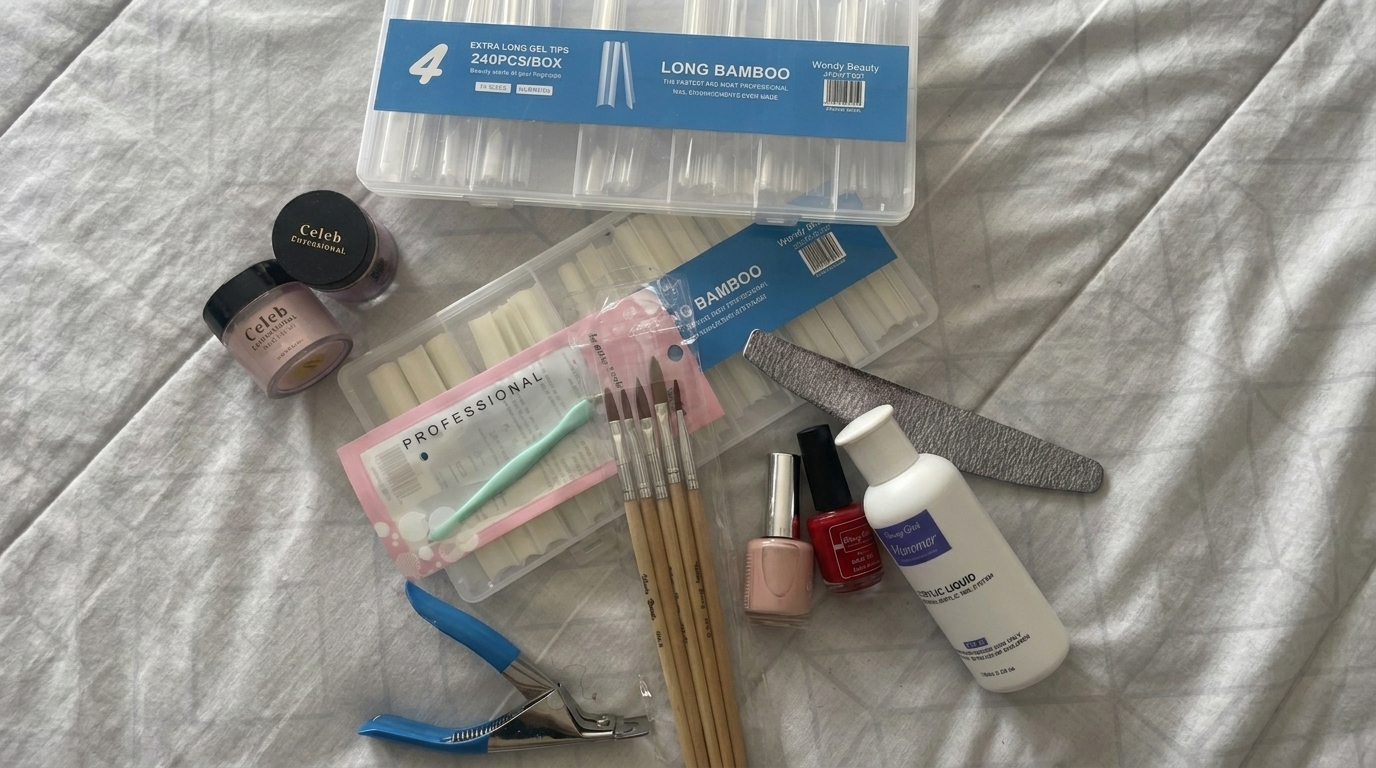
Materials and Tools You'll Need
- Clear base coat: one light layer per nail
- Pale blush-pink polish: milky and opaque without any shimmer, two coats
- Deep blood-red polish: with good pigmentation, art or striping variety preferred
- Optional metallic or mirror-finish red polish: for a flashy effect
- Glossy top coat: formulated to avoid smeared nail art
- Nail polish remover and lint-free pads: for prep and mistakes
- Nourishing cuticle oil: for the final touch
- Almond nail tips and nail adhesive: if you want extra length
- Fine-grit file: for soft almond edges
- Sturdy cuticle pusher or orange wood stick:
- Fine liner nail art brush: for drip outlines
- Tiny dotting tool: for finishing drip tips
- Narrow detail brush: for color fill-in
- Flat cleanup brush: for clean edges
- Compact mixing palette or foil: for small polish drops
- Nail dust brush: for a debris-free start
When picking products, try to choose a blush shade that does not streak and a red with a strong formula—you want coverage with one or two thin passes. A sturdy liner brush honestly makes all the difference with these drips. A drugstore kit will work, but if you plan to repeat this design, investing in a thin art brush is worth it.
 Pin
Pin
How to Make It Step by Step
- Prepping the Nail:
- Start by removing any lingering polish with remover and pads, wash well, and gently push back the cuticle with your stick. Shape the nail into a tapered almond using a fine file. If you are adding full-cover tips, size them from sidewall to sidewall for a true fit. Dust away filings and ensure nails are fully dry and oil free so that polish anchors clean.
- Perfecting the Base:
- Lay down a clear base coat and allow enough drying time so that color will grip evenly. Next, apply your pale blush-pink in two even layers. The key is to cover the whole nail, including the region to be topped with drips later, for even opacity and to prevent patchiness beneath your art.
- Planning the Drip Pattern:
- Visualize the drips before painting. Decide where to place short and long drops, aiming for gentle random spacing. A small dotting tool helps you create those rounded ends that feel just like real liquid splashes.
- Painting the Blood Drips:
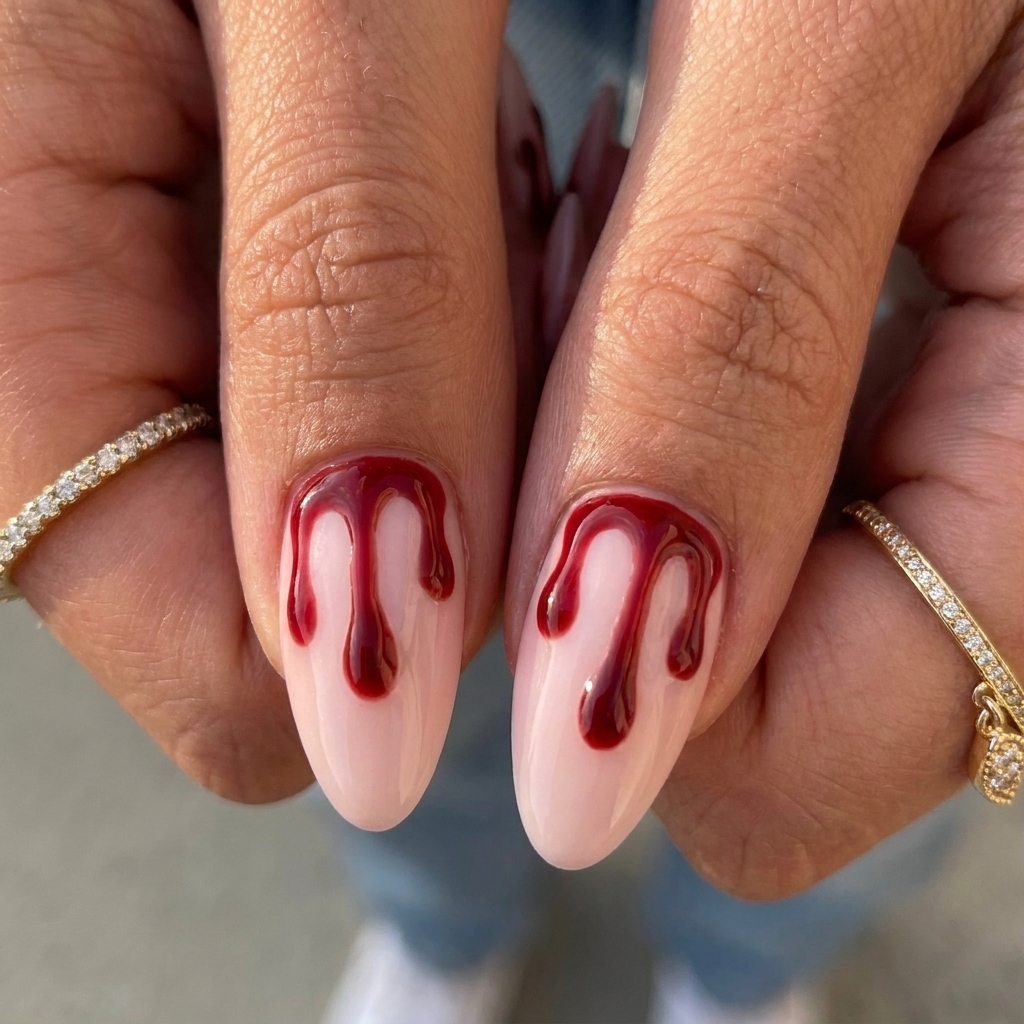
- Dispense a bit of red polish, then with your liner brush, paint a narrow arc at the cuticle area. Dot on rounded ends as guides for the length of each drip. Connect each dot to the red band with a thin line, then fill out the shape using the liner or detail brush. Adjust curves for that perfect liquid look.
- Enhancing and Finishing:
- If you want a metallic or chrome effect, layer a thin coat of your chosen polish over the red once dry. Tidy up edges with a flat cleanup brush dipped lightly in remover for pro results. Once everything dries to touch, seal each nail with a gentle layer of glossy top coat by gliding, not scrubbing, over the artwork. Add cuticle oil once fully dry.
 Pin
Pin
My favorite part of this design is figuring out each nail’s unique combination of drips. Some get longer, some end in a tight little bead of red. When I peel back my hands after drying and see each one look like it could actually drip, that tiny rush never gets old. The shine once you seal everything in is seriously addictive.
Polish Substitution Guide
If you do not have a true metallic red, use your regular dark red polish for the drips and brush on a shimmer topper before the top coat for added depth. For the base, any soft pink or nude with milkiness will create the same eerie transparency. You can also swap in a jelly red for a more syrupy blood effect.
Customization Ideas
This look is easy to personalize. Try a deep plum for a vampy twist or a black drip for an edgy latex vibe. Matte top coat gives a totally different mood and lasts just as well. For more glam, accent one or two nails with tiny rhinestones at the base of each drip. It is also fun to reverse the color scheme and do black drips on sheer red.
Common Mistakes to Avoid
One of the biggest pitfalls with this design is using a red polish that is too sheer, so always check opacity before working. Rushing the drip shapes leads to blobs instead of drips, so steady your hand or brace your pinky on the table. Lastly, avoid dragging your brush over partially dry red—this picks up color and can streak your pale base.
 Pin
Pin
There is nothing like rocking a set of glossy blood drip nails and seeing the reactions—equal parts envy and admiration—when you hold your coffee or stir witch’s brew punch. Every year, I tweak the technique just a little, but the essentials always stay the same: solid prep, thin layers, patience between coats, and a finishing shine that feels downright bewitching. If you try this look, get ready for compliments and maybe even a few people asking if it is your real blood—mission accomplished.
Design Questions
- → What skill level is this design?
This design is suitable for intermediate nail artists who have some experience with brushes and detailed work.
- → Can I use regular polish instead of chrome?
Yes, regular glossy blood-red polish can be used for the drips. For a more reflective effect, try metallic red polish.
- → How long does the mani last?
With a quality top coat and proper prep, the design can last 7–10 days on natural nails or up to 2 weeks with tips.
- → How long does it take to apply?
Application typically takes 60–90 minutes from prep to finished dry nails, depending on your skill and detail level.
- → How can I modify the technique?
You can adjust drip placement, change colors for a custom vibe, or use shorter nails and vary the almond shape.