
 Pin
Pin
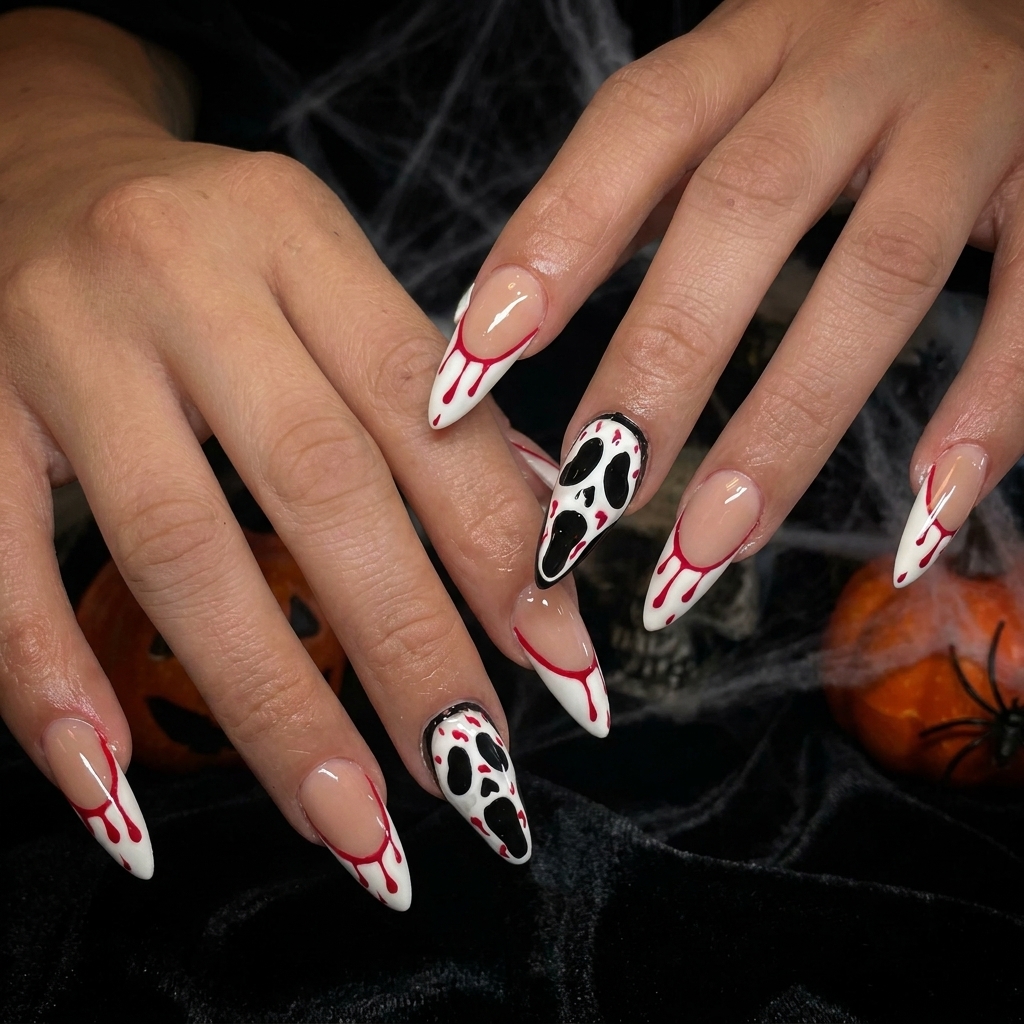
There is just something so satisfyingly spooky about these bloody French tips with a ghost face accent that makes them perfect for the Halloween season. I’ve done countless Halloween manis over the years, but this mix of crisp almond shapes, creepy red trails, and a haunted-cute ghost accent is always a favorite. The look is bold but intentionally a little messy, which means even if your red lines wobble or that ghost face gets a bit wonky, it just adds to the eerie vibe. Every October, I catch myself gravitating back to this combo for parties and movie nights because it is so much fun to create and guaranteed to get comments.
I always find this design surprisingly forgiving. Even with a shaky hand, those red drips feel natural, and sketching the ghost face lets you embrace the playful side of Halloween nail art. Whenever I share this mani, other nail lovers want to know how to get the ghost face just right.
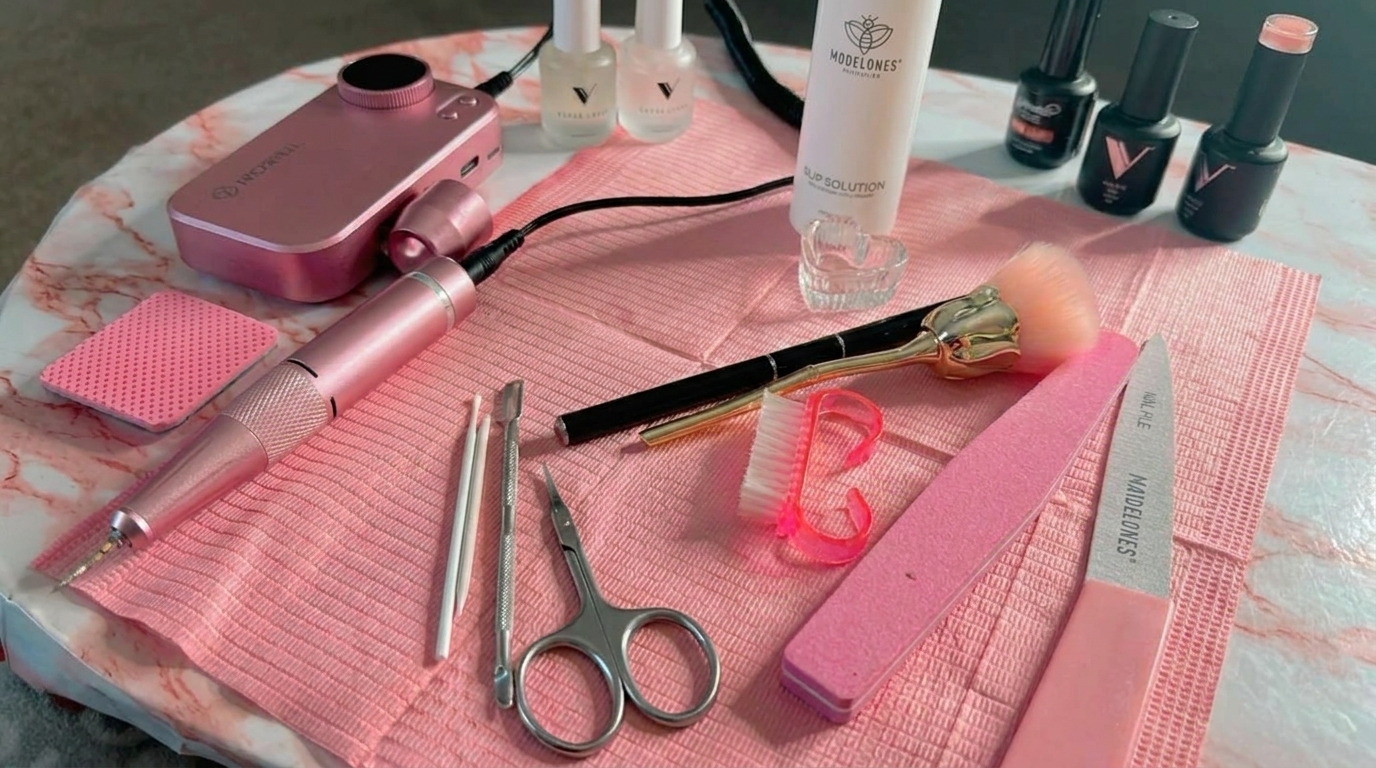
Materials and Tools You'll Need
- Clear base coat: you want a foundation that grips polish and smooths ridges
- Sheer nude-pink polish: translucent with a little color enough for one or two coats
- Opaque creamy white polish: get one that covers in one or two coats for sharp French tips
- Crimson or deep cherry-red nail-art polish: thin brush or bottle with a striper is ideal
- Opaque black nail-art polish: pigmented enough for tiny details
- Glossy clear top coat: look for a smudge-resistant formula if possible
- Long almond full-cover nail tips: optional or use your natural length
- Nail glue or adhesive tabs: only needed with tips
- Fine-grit nail file: about 240 grit gentle for shaping without tearing
- Fine liner brush: for red lines and trails
- Small detail brush: for the ghost face and white tips
- Small dotting tool: for adding red dots or ghost face marks
- Flat cleanup brush: for edges and correcting mistakes
- Nail polish remover and lint-free pads
- Small palette or foil: for decanting polish
- Dust brush and nourishing cuticle oil
A personal tip is to invest in quality liner and detail brushes. Brushes that are too stiff can drag your design but flexible fine-tipped brushes will let your red bloody borders glide. Also, streak-free sheer pinks and opaque whites make the end result far more polished.
 Pin
Pin
How to Make It Step by Step
- Prepping the Nail
- Start with clean, dry nails free from old polish and oils. Shape natural nails into a soft almond with a fine-grit file, or apply full-cover almond tips for added length. Remove any filing dust before starting.
- Painting the Base
- After base coat, sweep on a thin layer or two of sheer nude-pink over all but your accent nail. Try to keep the color even and translucent. For the middle finger accent, apply two coats of opaque creamy white until fully covered.
- Designing the French Tips
- With a detail brush and white polish, map out a deep smile line on the tips of each nude-pink nail. The white tip should extend a little further along the sides. Fill in the white section, keeping a crisp line at the border for that bold French look.
- Adding the Bloody Borders
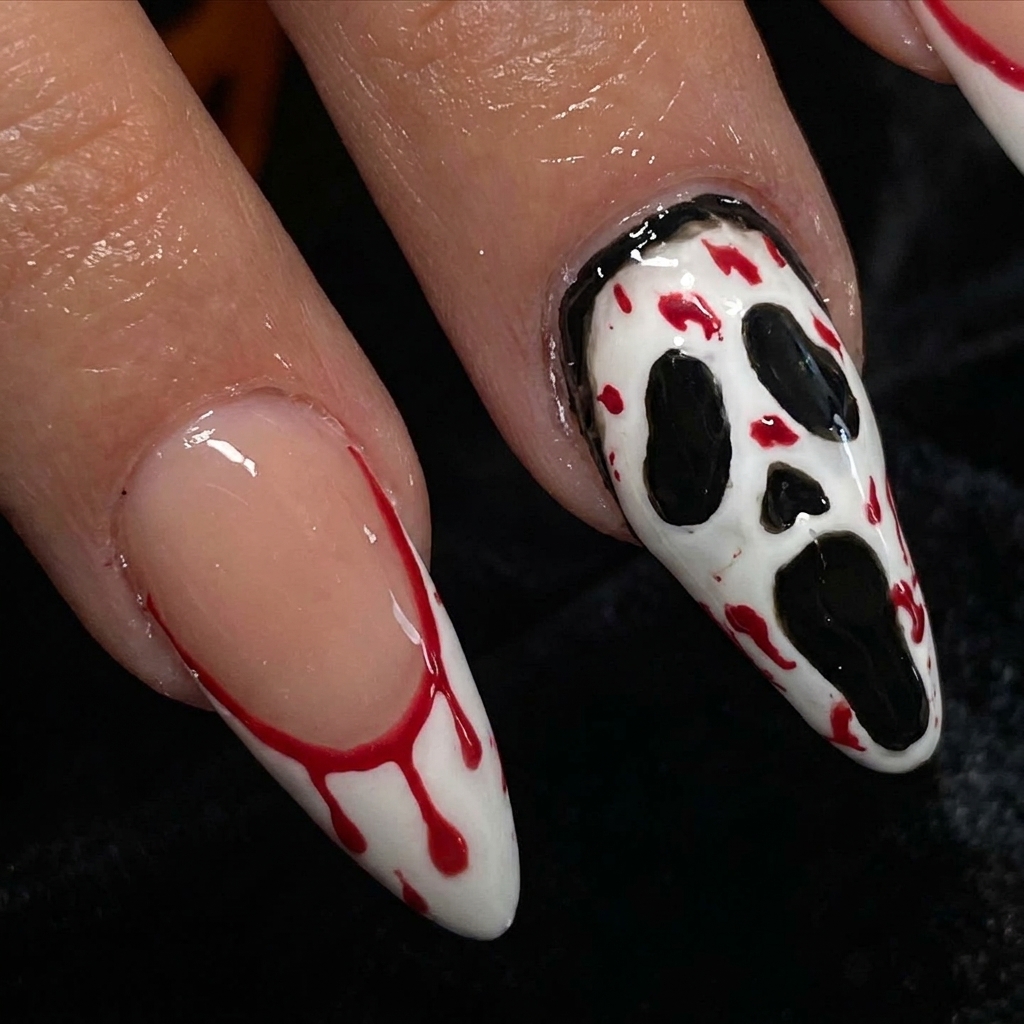
- Pick up crimson polish on a thin liner brush. Trace along the curved edge where pink meets white, making that red line stand out. Extend thin red trails from this border down into the white tips. Keep the drips organic and different for each nail. Dot the ends for a more dramatic droplet effect.
- Creating the Ghost Accent
- The ghost face goes on the middle finger’s white nail. Use a detail brush and black polish to paint stretched, abstract eyes and a mouth. Add miniature red dashes or drops nearby for that sharp, haunted look.
- Finishing Touches
- After all polish is dry, gently clean up edges with your flat brush dipped in remover. Once everything is crisp and dry to the touch, seal everything in with a glossy top coat. Let the top coat dry well, then condition with cuticle oil.
 Pin
Pin
One of my favorite parts of this mani is watching the ghost face come to life. No two faces are ever the same, so every accent nail has its own spooky personality. And painting those bloody red trails always feels oddly satisfying, especially as you vary their direction and thickness.
Polish Substitution Guide
There are so many ways to swap in polishes depending on what you have. Any sheer pink or nude will work for the base as long as your nail bed color peeks through. For the tips and accent, even a bright opaque white can stand in for creamy white. If you only have a classic red polish, decant a little on a palette and use a thin brush to get those drippy lines. Nail art pens can be another time-saver for tracing red or creating black details.
Customization Ideas
You can switch up the vibe by swapping the ghost face for a bat or spider accent, or add spooky glitter on the white tips for more drama. If you have shorter nails, shrink the tip and trails to fit the length or skip the pointed shape for an easier application. For a more subtle look, use a wine-red for the drips or tone down the white tips to off-white or beige.
Common Mistakes to Avoid
The top mistake I see is using polish coats that are too thick. This can smudge or wrinkle your art as you work. Also, forgetting to let the red drips dry fully before top coat can lead to streaks and color bleeding. Rushing the ghost face might leave it looking more like a smudge than a spooky accent, so take your time mapping out the shapes before painting.
How to Make Your Manicure Last Longer
Proper prep is everything. Start with scrubbed, oil-free nails and let each coat dry thoroughly before adding the next. Seal every edge with top coat to prevent chips, especially at the tips and around the smile line. If you are hard on your hands, apply a fresh layer of top coat every few days and moisturize with cuticle oil to keep your art from flaking.
Occasion Ideas
These nails are killer for Halloween parties, scary movie marathons, or even as an everyday October look if you love horror season as much as I do. The design is bold enough that you do not need full costume accessories to get into the spirit. I have also worn a version of this for haunted house visits, and it was a hit when handing out candy.
Skill Building Tips
- Practice your French tip curves on a swatch stick before trying them on your own nails
- Try sketching the ghost face onto paper first if you are nervous about proportions
- Use a dotting tool for drips if you struggle with a steady brush line
What Fellow Nail Artists Are Saying
Whenever I post this look, I always get comments like cannot stop staring at those bloody tips or the ghost is genius and creepy at the same time. Friends love that it is both classic and a little weird, and it always gets the best reaction at Halloween-themed events.
Products Used at a Glance
- Sheer nude-pink polish for the base shade
- Opaque white for the French tips and accent
- Crimson nail art polish for bloody borders and accent marks
- Black nail art polish for the ghost face features
- Quality liner and detail brushes for precise work
- Flexible almond nail tips if you want the extra length
 Pin
Pin
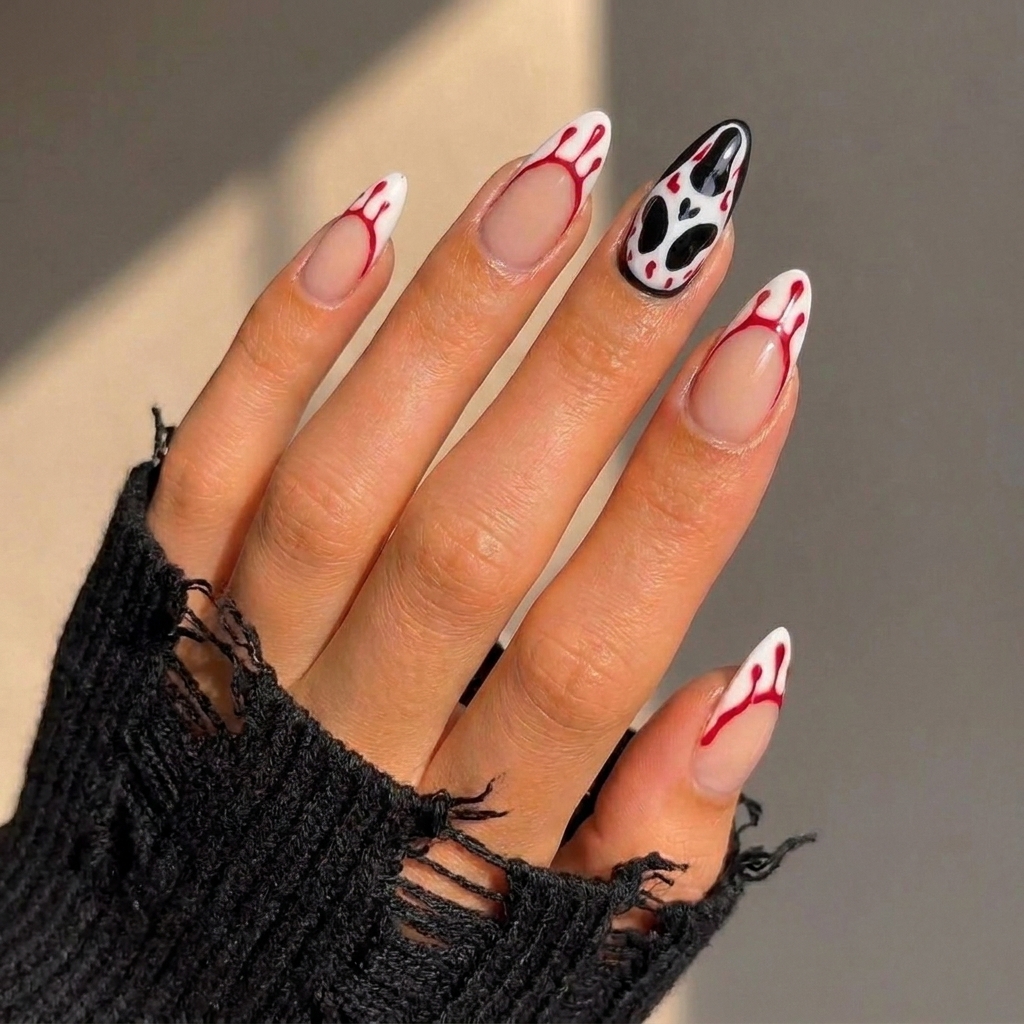
Haunted-chic and just gory enough, these bloody French tips with a ghost face are truly a Halloween staple in my rotation. The best part is there is so much room for creativity and personality, whether you want a dramatic, movie-worthy ghost or a dainty, smiley spook. No matter your skill set, you will end up with nails that are conversation-starters all through spooky season.
Design Questions
- → What skill level is this design?
This design is suitable for beginners to intermediate nail artists, thanks to simple color blocking and detail work.
- → Can I use gel polish instead of regular polish?
Yes, this design works with gel polish—just cure each layer under a lamp and use compatible brushes and top coat.
- → How long does the design last?
With a quality base and top coat, expect these nails to last up to 7 days with regular polish, or 2+ weeks with gel.
- → How long does this manicure take to apply?
Expect 45-60 minutes from prep to finish, allowing for polish drying between layers and detailed ghost accents.
- → Can I create this look on short nails?
Absolutely! Adapt the French tips and details for shorter nails—just keep the ghost face accent smaller and trails more compact.
- → How can I modify the technique for different shapes?
For square or oval nails, adjust the French tips to fit the shape and make trails slightly shorter to match the nail length.