
 Pin
Pin
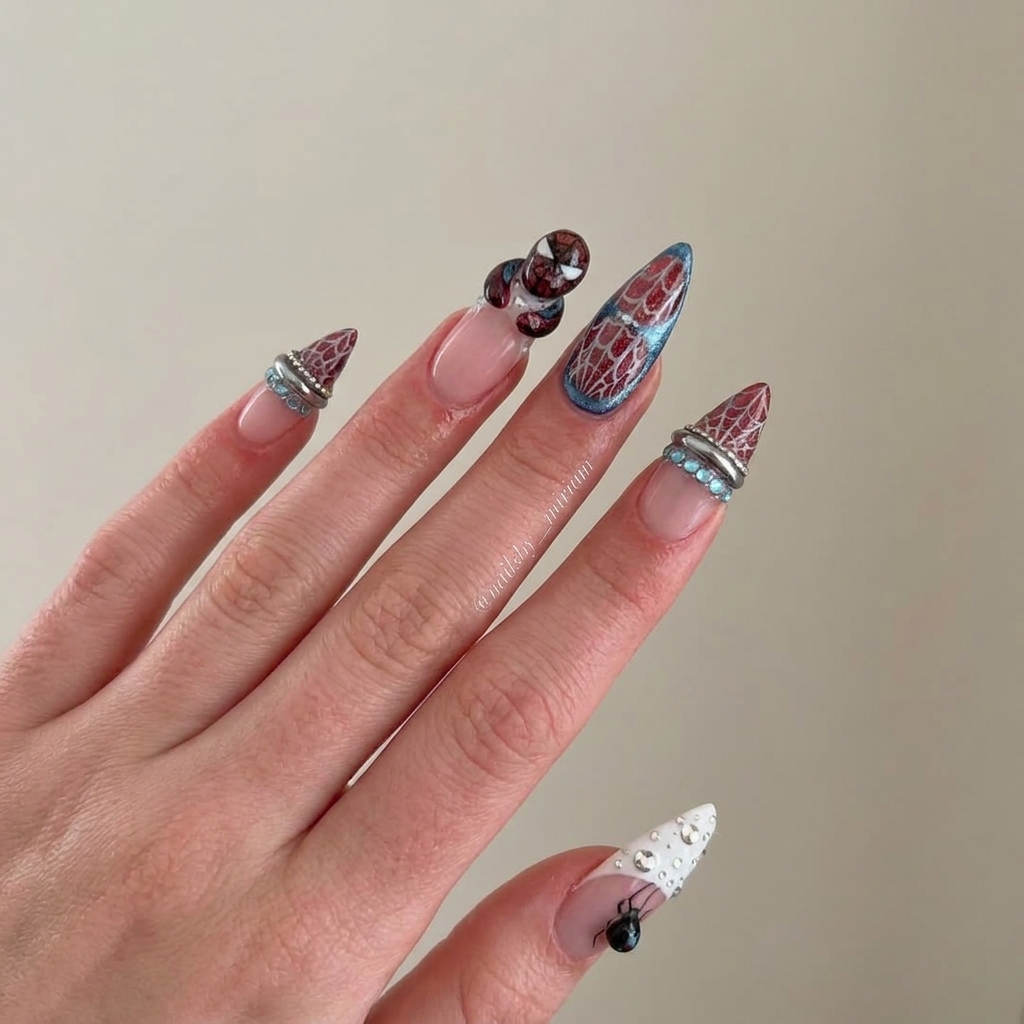
The drama of these Spider-Man web 3D character charm nails has completely taken over my nail table lately. There is something about mixing glossy burgundy, icy silver accents, and that tiny superhero face that gets everyone talking. I especially love how the sheer, delicate pink base amps up the contrast with all those metallics and bold web details. Whenever I wear this mani, I catch myself studying my own hands—there is so much to look at and textures you can actually feel.
Every time I try this design, the way all the different pieces layer up is so satisfying—the character charm really becomes the star of the show. It is definitely a conversation starter.
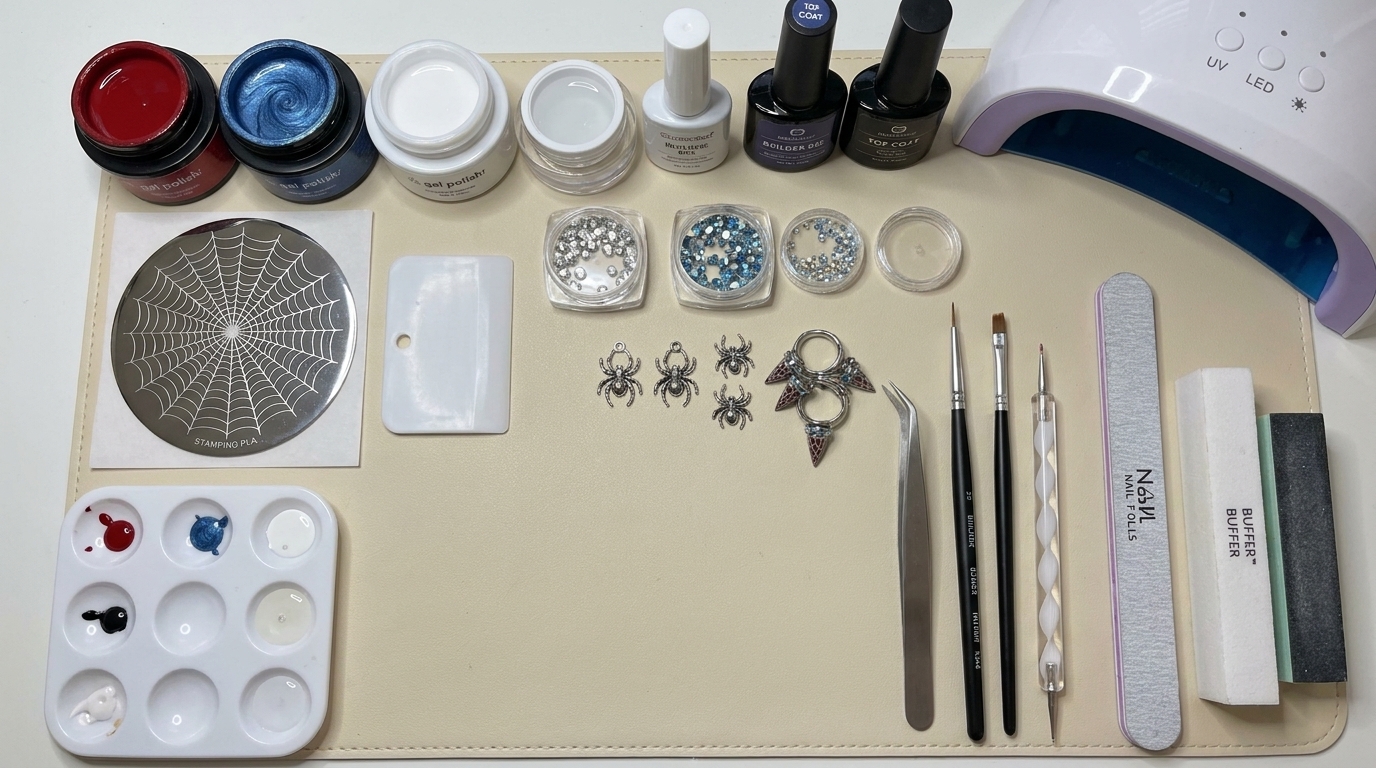
Materials and Tools You'll Need
- Long stiletto full-cover nail tips: Fit sizes to your hand for a custom look.
- Press-on nail stands and mounting putty: Keep nails steady while decorating.
- Sheer nude-pink polish: For that translucent base effect.
- Deep burgundy or wine-red shimmer polish: Use for French tips and the middle finger.
- Metallic turquoise-blue polish: Outline the middle nail and create accent bands.
- Opaque white nail-art polish: Draw graphic tips and clean web lines.
- Black nail-art polish: For spider detailing and outlines.
- Fine silver nail-art polish: Extra shine in your webs if desired.
- Clear base coat and glossy quick-dry top coat: Smooth foundation and shine.
- Premade curved silver nail bands: For sculpted metallic details.
- Fine silver microbead chain: Precise edging for special touches.
- Small aqua flat-back rhinestones: Sized to fit nail width for sparkle.
- Mix of clear or silver-backed rhinestones: Add glam accents, especially on the thumb.
- Tiny silver beads: Mimic scattered dots for extra detail.
- Small oval black or dark teal domed nail gem: Forms the spider body.
- Tiny black round gem: For the spider head accent.
- Spider-Man-style character nail charm: The hero face accent piece.
- Nail-art adhesive: Use for gems and 3D charms.
- Press-on nail glue or strong adhesive tabs: Attach tips securely.
- Liner and detail brushes, small dotting tool: For fine detail work.
- Rhinestone pickup pencil and tweezers: Make gem placement precise and easy.
- Fine file, lint-free wipes, dust brush, small palette: Basic manicure prep.
- Manicure stick and nourishing cuticle oil: Finish the look and maintain cuticles.
- For the best results with press-ons, look for tips that feel sturdy but not too thick at the cuticle. Invest in super fine liner brushes for webs—cheap ones can fray and make your lines uneven.
 Pin
Pin
How to Make It Step by Step
- Fit and Shape the Tips:
- Test-fit each tip for a perfect sidewall match and gently file for a soft, pointed stiletto shape just like the inspiration. Wipe away every bit of dust so your base goes on smooth.
- Set Up for Decorating:
- Secure your tips on stands using mounting putty. This gives you a steady surface and lets you paint, stick, and sharpen up details without smudging the sides or undersides.
- Build the Sheer Pink Base:
- Apply base coat if the tips need it, then brush on a couple of thin layers of the sheer nude-pink polish to the designated fingers. Each layer needs to dry fully for an even glassy look.
- Create the Burgundy and Blue Details:
- Sweep burgundy shimmer polish across the tips of your index and pinky, curving the edge for a clean French. Fill the middle nail with burgundy, then trace it with metallic blue polish around the perimeter and as an accent band.
- Paint Webs and the White Tip:
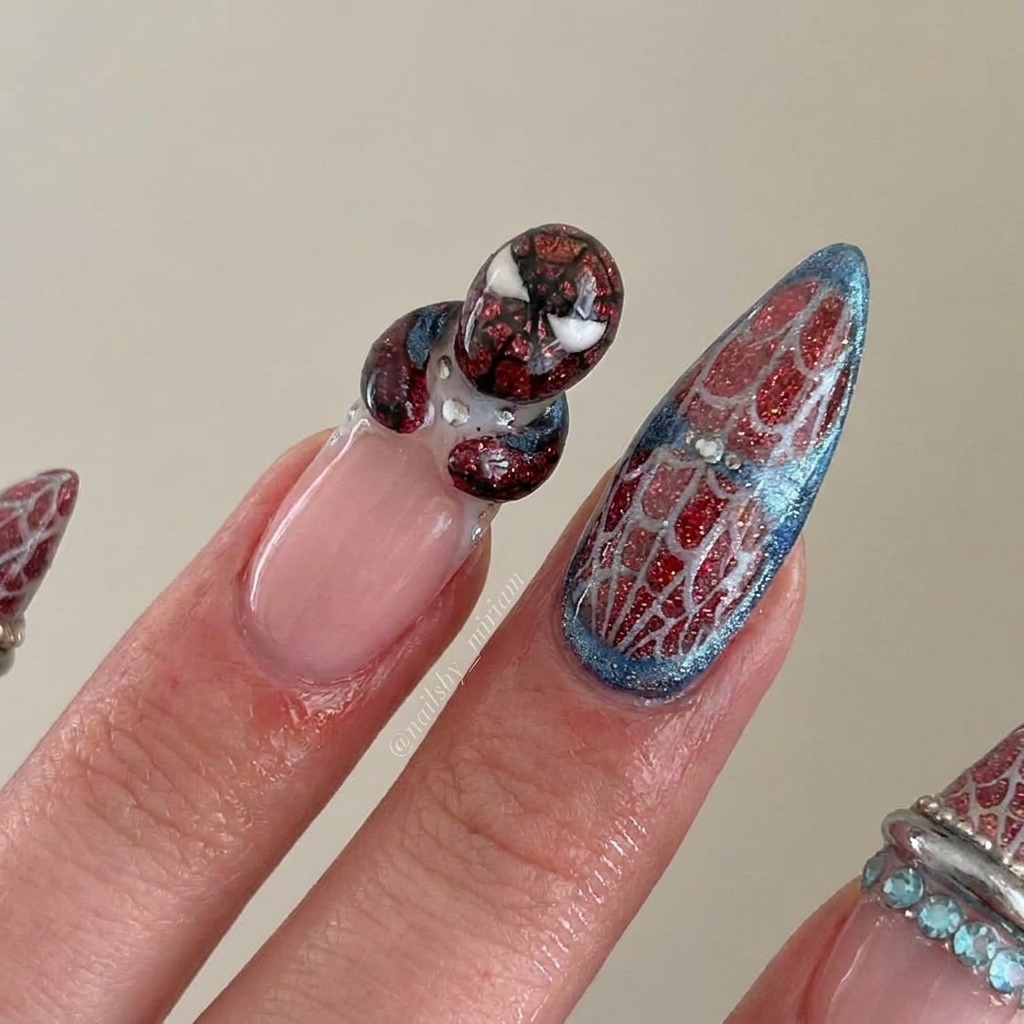
- Use your finest liner for thin, delicate spiderweb lines over the burgundy. Draw them in radiating spokes connected with curved cross-lines for an authentic look. On the thumb, paint a defined white tip before sketching in the spider legs with black polish.
- Topcoat and Gemwork:
- Seal the artwork with a slow, steady hand so lines stay crisp and colors pop. Once dry, glue on your raised metallic bands, microbead chains, and rows of rhinestones for dimension. Place the big gems for the jeweled spider and lay out rhinestones and beads for sparkle on the thumb.
- Charm and Final Touches:
- Set the Spider-Man charm on the ring finger exactly where it balances, and secure it with nail-art adhesive. Let all embellishments cure completely before removing the tips for press-on application. Finish with cuticle oil once they are attached.
 Pin
Pin
My favorite part is watching the mani come together when the gems and borders are finally placed—every nail suddenly looks finished and intricate. I always save the character charm for last because it is the most satisfying step.
Polish Substitution Guide
You do not have to track down the exact colors in the inspiration. Any rich burgundy shimmer will capture the drama, and a teal-blue chrome polish can stand in for the metallic. If you cannot find sheer pink, dilute a regular nude pink with clear polish. Silver nail tape can be swapped in if you cannot find curved bands, and flat rhinestones will give similar sparkle.
Customization Ideas
Mix up the look by using coffin or almond-shaped tips instead of stilettos for a softer effect. Try swapping the Spider-Man charm for any favorite character or theme—think Venom, Spider-Gwen, or even a tiny comic book logo. Add extra rhinestones for more bling, or use black microbeads for a goth-inspired twist.
Common Mistakes to Avoid
Skipping the base coat makes press-ons more likely to pop off. Avoid using too much adhesive for charms—it oozes out and can dull the finish. Be careful to keep the webs delicate and not overfilling the space. Heavy layers of top coat over gems can make them look cloudy.
 Pin
Pin
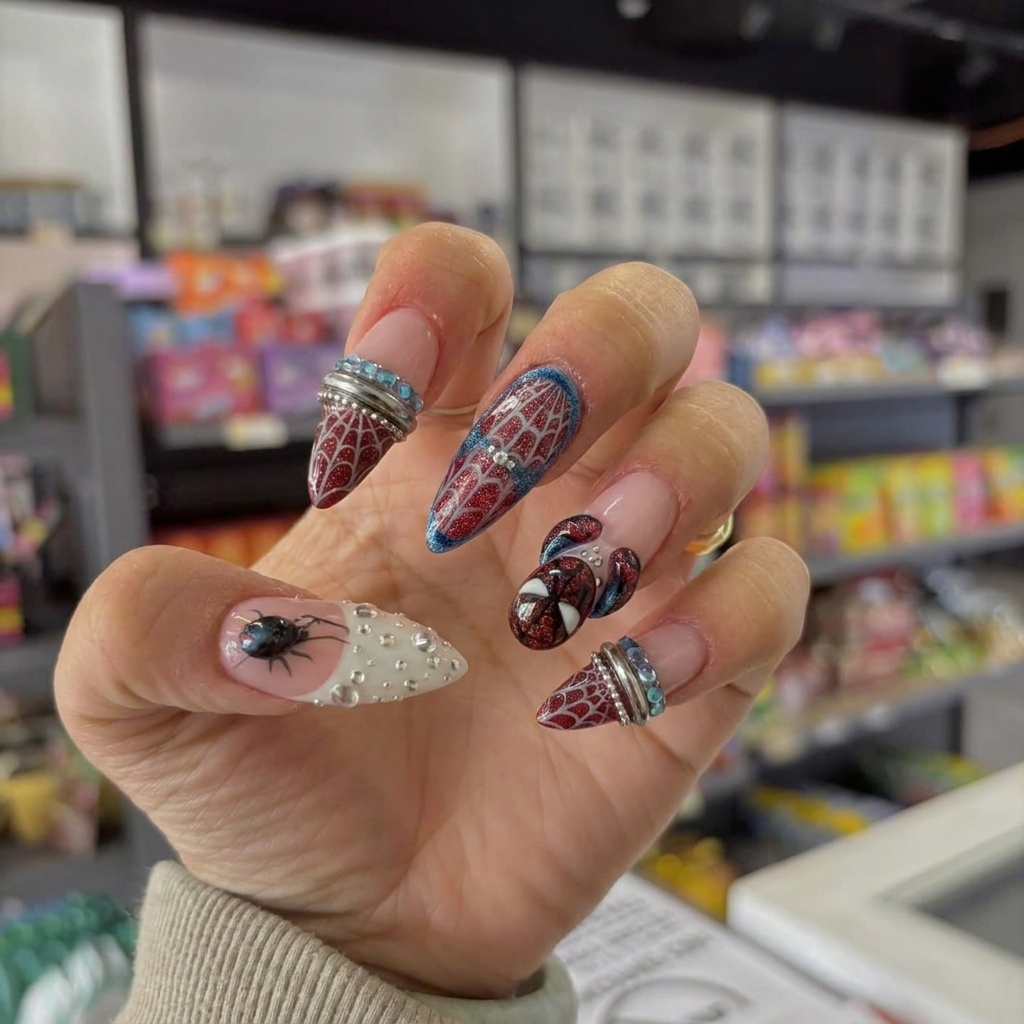
Getting playful with superhero nail art has taught me not to worry about perfection—details like off-center webs or an imperfect smile line just make the look more realistic and full of personality. If Spider-Man charms are not your thing, experiment with your own comic spin and let your nails tell your story.
Design Questions
- → What skill level is this design?
This design is suitable for intermediate to advanced nail artists due to its detailed line work and 3D charm placement.
- → Can I use gel polish instead of regular?
Yes, you can substitute gel polish for longer wear and easier layering, especially for intricate web and metallic details.
- → How long do the nails last?
When applied with strong press-on glue and proper prep, these nails typically last up to 10 days. Charms may require extra care.
- → How long does the design take to apply?
Expect to spend 1.5–2 hours creating this look, including painting, gem application, and securing the character charm.
- → Can I change the charm or colors?
Absolutely! Swap in a different superhero charm, vary the web color palette, or change rhinestone shades to make it your own.